Help guide
Creating a GitHub fine-grained token for Nexum
You only need this if the organization or repositories you're auditing are private. For fully public orgs/users, leave the token field blank — Nexum reads publicly visible data without one.
- Go to github.com and make sure you're logged in as someone with access to the org/repos you're auditing.
- Click your profile picture (top right) → Settings.
- In the left sidebar, scroll down to Developer settings (near the bottom).
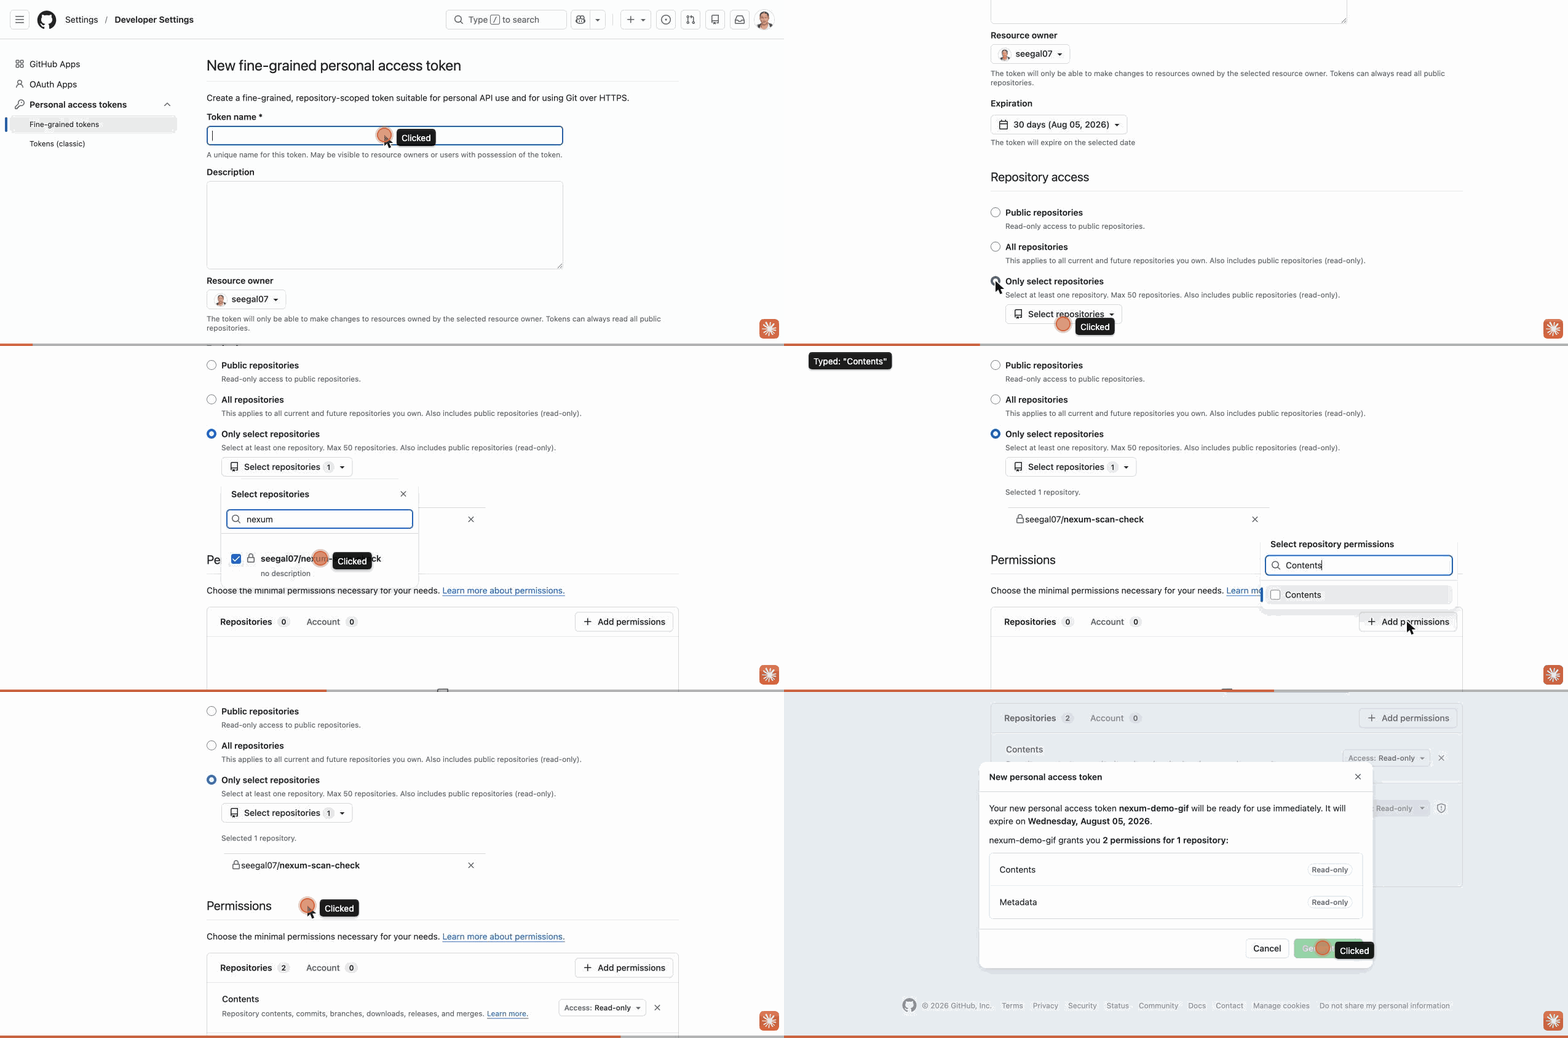
- Personal access tokens → Fine-grained tokens → Generate new token.
- Give it a name you'll recognize later, e.g. "Nexum audit — read only".
- Set an expiration — a short one (7 days) is recommended since this token only needs to exist for the audit.
- Resource owner: select the organization or account you're auditing.
- Repository access: choose only the specific repositories being audited, or "All repositories" only if you genuinely want org-wide visibility.
- Under Permissions, grant only what's needed as Read-only (e.g. Administration, Members, Metadata) — never grant any Write permission or account-wide scope.
- Click Generate token, then copy the value immediately — GitHub shows it only once.